Cooking yourself a nice, juicy pork chop can be a little tricky. Unlike beef where you can cook the meat to various degrees, pork needs to be cooked thoroughly to ensure safe consumption. There are different methods of cooking the perfect pork chop, though, and you don’t need a top-of-the-line grill or even anything more than a stovetop. These three simple methods will teach you how to cook pork chops so you can bring perfect pork to the dinner table every time.
Choosing Your Meat

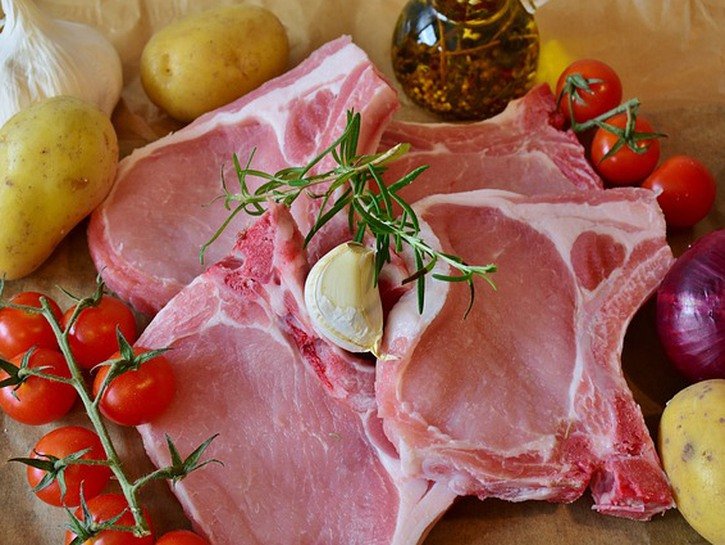
Before you get to cookin’ there are a few things you should go over first. The first hurdle you need to jump over is deciding which cut of pork you want for dinner. Just like any meat, some cuts are bone-on while others are purely meat and fat. Others a little more tender than others to begin with, while some offer a tougher meat. It all depends on which one you’d like to indulge in.
Pork chops all come from the loin of the pig, which is just under the back fat. There are four main chops that stem from the loin and here’s a quick breakdown of each:
Loin: This cut comes from the hip and you should be able to see a little t-bone towards the top of it; loin will be on one side of the bone whereas tenderloin will be on the other side of the bone. They’re a lean cut.
Boneless: These chops are quite lean and don’t really have a lot of fat to them. Some consumers gravitate towards these ones, but you’d be better off grabbing bone-in chops for a more flavorful meal.
Shoulder: Given its name, you should be able to tell where this guy comes from. It offers a tougher cut, though, and should be tenderized before you cook it. This chop also tends to have a lot of fat.
Rib: The name is self-explanatory in terms of location and its look is another dead giveaway. You’ll be able to identify this one easily because it looks like the letter “P.” It has one bone running along the side of it and a hunk of meat stemming from it. It’s already pretty tender so there’s no additional prep work needed.
Quick Tips
Oftentimes people will purchase chops that are a pound each, which equates approximately an inch in thickness. The reason why is that it’s easier to cook these. If you’ve ever cooked a thinner piece of meat then you know the leaner something is, the more prone it is to being overcooked. Purchasing thicker pork prevents this in the long run.
If you ever wondered how to tell when your chops are done without over or undercooking them, a meat thermometer is in order. Much like with ground beef, aim to get a thermometer that acts as a kitchen helper when you’re grilling or baking. The USDA recommends that you cook pork chops to an internal temperature of 145 degrees and let them cool for three minutes before serving.
How To Cook Pork Chops In The Oven

One of the first things you should know about this method is that you’ll need your oven and the stove top to achieve top-quality chops. The best way to bake your chops is to actually grill them a bit on one side first and then bake them. Have a look:
What You’ll Need
- 1-inch pork chops
- Pan
- Baking Sheet
- Meat thermometer
- Kosher salt
- Black pepper
- Olive oil
Steps
- Ensure that your meat has been thawed thoroughly before you bake them. Leave them at room temperature for 30-35 minutes before cooking.
- Preheat the oven to 400 degrees.
- Pat your chops dry with paper towel and apply a generous coating of salt and pepper on both sides. Baste the chops with olive oil before cooking.
- Heat the pan on the stovetop for about 5-6 minutes.
- Once the pan is hot, lay your chops on the pan and let sit for 3 minutes. Do not flip them or move them.
- After 3 minutes, flip the pork chops and remove the pan from heat. Transfer your chops and the pan to the oven.
- Let your chops bake for an additional 7-8 minutes.
If you’re unsure if the pork chops are done, this is where your trusty meat thermometer comes in. Check the internal temperature and ensure that your chops achieve at least 145 degrees before consuming.
Once the proper temperature has been reached, remove them from the oven and loosely tent them with aluminum foil. Let them sit for about 3-4 minutes before you serve.
How To Cook Pork Chops On A Stovetop

If you’re looking to shave some valuable time off your cooking and want to fry your chops on a stovetop then you’re in luck. Frying pork doesn’t too long and you’ll be left with the same juicy end product.
What You’ll Need
- 1-inch pork chops
- Kosher salt
- Black pepper
- 1 1/2 teaspoons of butter
- 1-2 tablespoons of olive/canola oil
- Meat thermometer
Steps
- Ensure that your meat has been thawed thoroughly before you bake them. Leave them at room temperature for 30-35 minutes before cooking.
- Pat your chops dry with paper towel and apply a generous coating of salt and pepper on both sides. Baste the chops with olive oil before cooking.
- Preheat the pan over medium-high heat.
- Add the canola/olive oil and butter.
- Lay your pork chops in the pan and grill 2-4 minutes on the first side.
- After the allotted time, flip them over with a pair of tongs and fry on the other side for an additional 1-3 minutes.
If you see pink juices coming from your chops then you know they’re undercooked. If you’re wondering whether the chops are ready, stick the meat thermometer into the pork and determine the temperature. Once it reaches 145 degrees, remove from heat and loosely tent with aluminum foil for 3-4 minutes before serving.
How To Cook Pork Chops On A Grill

Consider ditching the hot dogs and burgers this summer and flame up other cuts of meat to really wow everyone at the barbecue.
What You’ll Need
- 1-inch pork chops
- Tongs
- Meat Thermometer
Steps
- Light your grill. You might want to only pile your charcoal to one side or only light one side of the grill so you can have different temperatures going.
- Place your chops over the hottest part of the grill and let sit for about 3-5 minutes.
- Once the allotted time has passed, flip the chops using a pair of tongs and grill for another 2-4 minutes.
- As soon as the pork chops develop a nice brown color, move them to the cooler part of the grill so they keep cooking, just not over direct heat.
- Keep grilling until the juices are no longer pink. This should take about another 1-3 minutes.
- Insert a meat thermometer to check the internal temperature. Once the temperature reaches 145 degrees, remove from heat and let sit for 3-4 minutes before serving.
Those are the top three ways that you can cook your pork chops to perfection. Remember that you can season them however you like or brine them beforehand to really get a good flavor going. Happy cooking!